Getting an acceptable image on a DSLR is generally not difficult. Getting a professional, consistent, stable image is occasionally very hard.
Exposure

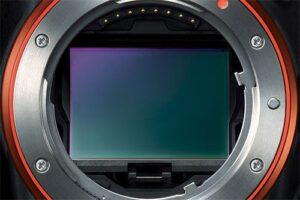
The single greatest aspect of achieving a pleasing image is ensuring the image is exposed well. Exposure is the process in which light reaching the camera’s sensor is absorbed, quantified, converted to an electrical signal and digitally coded into a recorded image. It is comparable to the photochemical film equivalent of light reaching the photosensitive film in sufficient quantity, so it can be developed later.
For an acceptable image, sufficient light must reach the sensor through the attached lens apparatus.
There are three things which directly affect the image exposure – the lens aperture, shutter speed and ISO. We’ll take each of these separately.
Aperture
Put simply, the lens aperture measures the size of the hole in the lens apparatus which lets light pass through to the sensor. This is expressed in f-stops and represented by numbers like f/2.8, f/5.6, and so on. The smaller the f-stop number, the bigger the opening and the more light passes through it.


The aperture has a dual purpose – it allows you to control the depth of field in the exposed image. The depth of field is a term which expresses how much of an image area is in focus. A shallow depth of field means very little of the image is in focus, a deep depth of field means a large amount of the exposed image is in focus. A shallow depth of field allows the camera operator to isolate a subject from its background.
Recap: the aperture controls the amount of light hitting the sensor. It also controls the depth of field.
Shutter Speed
The camera’s sensor is usually covered. The mechanism which opens and closes this cover is called the shutter. When the camera takes a picture, the shutter opens and closes to allow light to hit the sensor – to capture the picture. During this time, the camera sensor is quite literally exposed by the shutter for a short amount of time, determined by the shutter speed.
The shutter speed is typically measured in fractions of seconds. 1/50th of a second is common for use in video productions – although this depends on the video frame rate.
To achieve sufficient exposure, the shutter speed can be controlled by the camera operator. If the shutter is open for longer, more light reaches the sensor, increasing the amount of light hitting the sensor. If the shutter is open for less time, less light hits the sensor.
The shutter speed has a dual purpose – it controls exposure, but it also controls the amount of motion blur in the recorded image. If your subject moves during the time taken for the shutter to open and close, then there will be motion blur on the subsequent recorded image – which may or may not be desired.
Recap: a slow shutter speed: more light hitting the sensor, more motion blur. A fast shutter speed: less light hitting the sensor, less motion blur.
ISO
There is one final aspect to ensuring decent image exposure – increasing or decreasing the sensitivity of the image sensor – and this is measured in ISO. The lower the number, the less sensitive your camera is to light, and vice versa. Raising the ISO to ensure acceptable exposure is a bit of a dull instrument – but can be helpful in various circumstances.

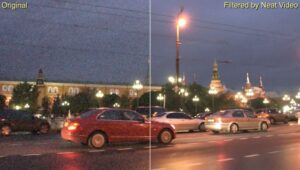
Like using more photosensitive film – in film photography, the more sensitive your camera’s settings are, the more likely the resultant image will contain noise in the resultant electrical signal and coded image. There is also a reduction in colour resolution. These can be tempered in post-production, with noise reduction software and colour grading suites – which can help you achieve more pleasing results, but invariably detail is lost.
Recap: Raising ISO means you need less light hitting the sensor. Noise can be problematic and colour resolution take a hit.
External factors
A camera operator can also resolve several concerns with over or under-exposure by using external means.
If shooting in bright daylight, or at the height of summer, it may not be possible to lower the sensitivity of the camera enough to prevent over exposure. Additionally, you may not wish to lower the aperture – to ensure a shallow depth of field – or retain motion blur. In this circumstance, you would likely use filters to directly reduce the amount of light entering the lens.
When shooting outdoors – a good neutral density filter should be one of the first things you obtain. It absorbs light of all wavelengths to the same extent, causing overall dimming but no change in colour. Such filters screw into the end of the lens.
When shooting in dark areas – and without a willingness to increase motion blur, or shallow the depth of field, you will have to learn how to light the scene and actors effectively. This is out of the scope of this blog post, but there are useful YouTube lessons in lighting scenes well.

Leave a Reply